Finally! Here's the tutorial I promised - it's been a crazy week and I ended up not feeling well but all is good now!
You can click on the pictures to make them bigger.
Supplies
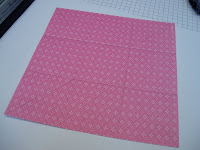
6" X 6" Double sided Designer Series paper such as Patterns Pack II (L1 Hostess reward)
8 1/2" X 1/2" strip in matching cardstock
Snail Adhesive
Sticky Strip
Cutter with scoring blade
SU Cherry Blossom Embosslit
Big Shot

Steps
1. Score each side of the 6" X 6" DSP at 2"

2. Score each corner from where the score lines cross to the outer tip of the corner - do not score the centre box.
(I have darkened the score lines in this photo)

3. Fold on all score lines.
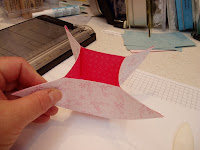
4. Place snail adhesive on each corner within the triangle space formed by the score lines.
See picture for placement.

5. Pinch the corner together as shown in the next picture and repeat on the other 3 corners.

Your box should look like this now:

6. Fold each flap over to one side of the box. Make sure you fold all flaps in the same direction. adhere them to the side of the box with sticky strip.

7. Attach the handle inside the box, making it as long as you like.

8. Decorate as desired. I used the Stampin' Up! Cherry Blossom embosslit and the Big Shot. I have pictures of that if you want to see it too.
You can also fill your little basket with 1/4" strips of cardstock that have been run through a crimper.

Hope you like it!

1 comment:
This is too cute! I am going to have to give it a try.
Post a Comment